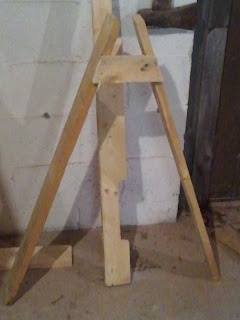
Mandi discovered a bunch of DIY projects that use pallets, either whole or the pieces. She also found a perpetually refilled pile of pallets conveniently sitting across from her building at work, so we got to thinking about what we would use them for. We have a few projects lined up (one that might end up not using a pallet, more on that later). My first project was to build a couple of sawhorses. I've been on the lookout for free or cheap options without any luck. I decided to look up plans for building my own and found some good guidelines. My biggest challenge was trying to figure out the angles for the legs. The plans I found required cutting the ends of the legs at a 60 degree angle, but my circular saw can't do that. I finally figured out that I could use my speed square to mark the angle on the support piece and use my jigsaw to cut the angles. Once I realized that it was a breeze putting them together. Mandi was kind enough to document the process of building the second sawhorse. I'm pretty proud of how they turned out. Cost? Zero. The wood was free, I found the nails in the garage, and I already had the bottle of wood glue. The only source of cursing, other than trying to figure out the angles, was when I whacked my thumb with the hammer.
 |
| The pieces. |
 |
| Marking the support placement on the legs. |
 |
| Making sure the legs are flush with the top. |
 |
| Applying the glue. |
 |
| Ready for nails. |
 |
| Leg fully assembled. |
 |
| Final assembly. |
 |
| Nailing the legs. |
 | |
| Final product. |
Great Job! Tell wife you always take stuff when it
ReplyDeleteis free no matter if you will use it or not. You can always get rid of it if you don't use it. Proud of my "thrifties". Make me proud.
Thanks Mom. ;)
ReplyDelete